个人博客-从hexo迁移到hugo

安装 installation

Git语言开发环境

因为之前已经安装所以不再赘述。

Go语言开发环境

点击下载相应版本并进行安装。

完成安装◎ 完成安装的界面

Hugo安装

点击下载相应版本,并将Hugo.exe解压到你指定的文件夹内,如E:\Hugo\bin。随后,将这个路径添加到系统变量Path中,保存即可。

image-20230112171520643

修改完成后打开Git Bash,输入hugo version,如果出现以下界面,则说明hugo已经安装完成。

image-20230112172028352

使用hugo创建一个新的网站

输入命令行hugo new site blog,就饿可以生成一个新的blog文件,用来装载博客相关的文件。可以看到给出了一些提示:

  1. 需要安装一个主题,并且放在同名文件夹内
  2. 可以通过命令行hugo new <SECTIONNAME>\<FILENAME>.<FORMAT>来添加一个新文件
  3. 如果需要启动内置的实时服务器,输入hugo server
 1
 2
 3
 4
 5
 6
 7
 8
 9
10
11
12
13
$ hugo new site blog
Congratulations! Your new Hugo site is created in E:\Hugo\bin\blog.

Just a few more steps and you're ready to go:

1. Download a theme into the same-named folder.
   Choose a theme from https://themes.gohugo.io/ or
   create your own with the "hugo new theme <THEMENAME>" command.
2. Perhaps you want to add some content. You can add single files
   with "hugo new <SECTIONNAME>\<FILENAME>.<FORMAT>".
3. Start the built-in live server via "hugo server".

Visit https://gohugo.io/ for quickstart guide and full documentation.

为博客安装主题

可以从Hugo官方提供的主题库中寻找自己喜欢的主题,下载之后,解压到Hugo/blog/themes的同名文件夹之中。也可以使用git clone命令来克隆主题库。

我选择了MemE这个主题,可以不用修改太多就把hexo主题中的内容移到hugo框架下。(因为hugo识别markdown和hexo有部分区别,自己修改费时费力,所以我就采用了这个主题)

安装完成后直接将hexo文件中\source\_posts中所有的md文件移到hugo文件夹中的\blog\content\posts下。

注意:如果文档中的图片之前采用的是本地图片上传的形式,迁移到了hugo之后要把所有图片放到\blog\static之中。

开始创作博文

新建文档

总体来说和hexo中类似,都是使用markdown语言来写博文。在Git Bash中输入:

1
hugo new "posts/<filename>.md"

即可新建一个文档。

image-20230112202234089

文档标头 front matter

使用MemE主题的时候,生成的博文md文件标头有以下内容:

title: "个人博客 从hexo迁移到hugo"
date: 2023-01-12T20:22:11+08:00
draft: true

随后加上slug(用于生成文件的url),tags和categories便可开始写作。

slug: blog-from-hexo-to-hugo
categories:
  - Study
  - CS
  - 个人博客
tags:
  - hugo
  - 个人博客管理

修改hugo new post文件模板

使用hugo new site命令创建网站之后,可以看到以下文件夹,修改archetypes中的default.md,保存之后就可以成功修改模板。

blog/
├── archetypes/
│   └── default.md
├── assets/
├── content/
├── data/
├── layouts/
├── public/
├── static/
├── themes/
└── config.toml

我根据自己平时的需要加上了以下内容:

 1
 2
 3
 4
 5
 6
 7
 8
 9
10
11
title: "{{ replace .Name "-"  " " | title }}"
slug: 
categories: 
  - 
tags:
  - 
date: {{ .Date }}
image: /{{ replace .Name "-"  " " | title }}/cover.jpg
summary: 
draft: false
toc: true

将hugo上传github并部署

设置baseURL

config.toml文件中把baseURL修改为https://<USERNAME>.github.io

添加GitHub Action文件

在.github/workflow/gh-pages.yml中添加以下内容,如果没有该文件,则创建:
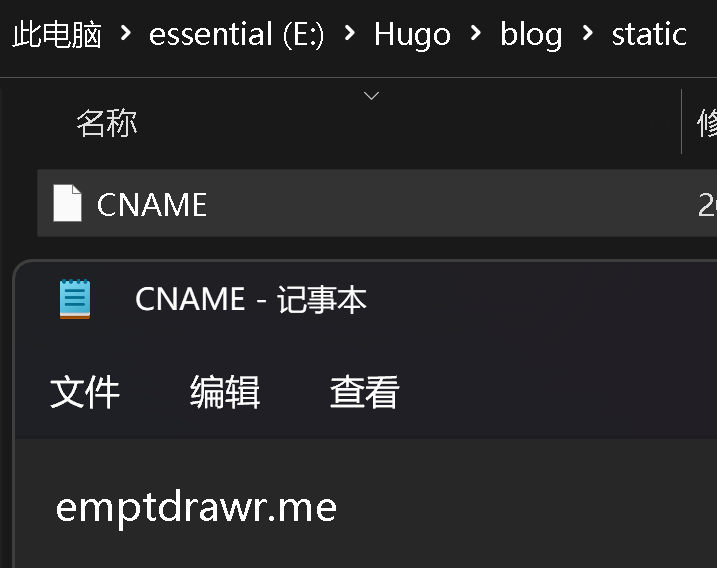
 1
 2
 3
 4
 5
 6
 7
 8
 9
10
11
12
13
14
15
16
17
18
19
20
21
22
23
24
25
26
27
28
29
30
31
32
name: github pages

on:
  push:
    branches:
      - main  # Set a branch that will trigger a deployment
  pull_request:

jobs:
  deploy:
    runs-on: ubuntu-22.04
    steps:
      - uses: actions/checkout@v3
        with:
          submodules: true  # Fetch Hugo themes (true OR recursive)
          fetch-depth: 0    # Fetch all history for .GitInfo and .Lastmod

      - name: Setup Hugo
        uses: peaceiris/actions-hugo@v2
        with:
          hugo-version: 'latest'
          # extended: true

      - name: Build
        run: hugo --minify

      - name: Deploy
        uses: peaceiris/actions-gh-pages@v3
        if: github.ref == 'refs/heads/main'
        with:
          github_token: ${{ secrets.GITHUB_TOKEN }}
          publish_dir: ./public

自定义域名

需要在static文件里创建一个CNAME文件,里面写入自己的域名。如下所示:

image-20230112223750756

部署到GitHub

进入blog\public\文件,将其中的文件push到<username>.git.io库的gh-pages分支,随后在设置中把默认分支改为gh-pages。

自动部署脚本

 1
 2
 3
 4
 5
 6
 7
 8
 9
10
11
12
13
14
15
16
17
18
19
20
21
22
23
24
25
26
27
28
29
30
31
32
#!/bin/bash
# Program:
#   发布hugo生成文件到GitHub Pages
# History:
# 2020.05.05 GeekWho First release.
# If a command fails then the deploy stops
set -e

printf "\033[0;32mDeploying updates to GitHub...\033[0m\n"

# Build the project.
hugo --minify # if using a theme, replace with `hugo -t <YOURTHEME>`

# Go To Public folder
cd public

# 切换到gh-pages
git checkout gh-pages

# Add changes to git.
git add .

# Commit changes.
msg="Published on $(date +'%Y-%m-%d %H:%M:%S')"
if [ -n "$*" ]; then
    msg="$*"
fi
git commit -m "$msg"

git pull --rebase origin gh-pages
# Push source and build repos.
git push -f origin gh-pages

注意

如果在重新部署以后发现css样式没有应用,那么应该使用Ctrl+F5刷新页面,刷新之后即可发现网站可以正常显示。

参考

updatedupdated2023-01-132023-01-13